

If you own an R53 Mini Cooper S, it’s essential to keep your supercharger in top condition for optimal performance. Regular maintenance, repair, and rebuild are vital to ensure that your supercharger operates at its best. In this section, we’ll provide you with a comprehensive guide on how to service your R53 supercharger, so it performs efficiently and reliably.
From understanding the workings of the supercharger to preparing for the service process, our step-by-step instructions will guide you through every step to service your R53 supercharger effectively. By following our guide, you can ensure that your supercharger operates at its best and prolong its lifespan.
Key Takeaways:
- Regular maintenance, repair, and rebuild of your R53 supercharger are essential for optimal performance.
- Understanding the functioning of the R53 supercharger is essential before starting the service process.
- Proper preparation is necessary before starting the actual service process.
- Regular inspection and cleaning are essential to keep your R53 supercharger in top condition.
- Proper lubrication and fluid levels are vital for the smooth operation of the R53 supercharger.
Understanding the R53 Supercharger
Before performing any service on your Mini Cooper’s R53 Supercharger, it’s important to have a good understanding of how it works and why regular maintenance is required for optimal performance.
The R53 Supercharger is a belt-driven, centrifugal supercharger, meaning it uses a belt to spin an impeller that draws in air and compresses it, creating forced induction. This results in better engine performance, increased horsepower, and improved torque. But with this added performance comes added stress on the supercharger, emphasizing the need for regular maintenance.
Proper maintenance of the R53 Supercharger can extend its lifespan and prevent costly repairs in the future. Regular maintenance tasks, such as inspecting and cleaning the supercharger components, lubricating the gears and bearings, and replacing the supercharger oil, are crucial to keep the supercharger functioning at its best.
Additionally, it’s important to perform maintenance on other components that work in conjunction with the supercharger, such as the air filter and intercooler. Neglecting these components can result in decreased performance and potential damage to the supercharger.
Mini Cooper Supercharger Service
Whether you own an R52 or R53 Mini Cooper S, supercharger maintenance is a crucial part of keeping your car running smoothly. By following a regular maintenance schedule, you can ensure your supercharger is operating at optimal levels, providing you with the performance you desire.
R53 Supercharger Maintenance
Regular maintenance of the R53 Supercharger is essential to keep it functioning optimally. This includes inspecting the supercharger for signs of wear or damage, cleaning the components to prevent debris buildup, and lubricating gears and bearings to reduce friction and wear. Performing regular maintenance tasks on your R53 Supercharger will help prevent costly repairs in the future and extend the lifespan of the supercharger.
Supercharger Service Preparations
Before starting the supercharger service, it’s crucial to have the necessary preparation to ensure a smooth process. Follow these steps to prepare for the R53 Supercharger service:
Gather the Necessary Tools and Materials
Make sure to have all the tools and materials required for the job.
This includes basic hand tools such as sockets, wrenches, and pliers, as well as specific tools like a torque wrench and an air compressor.
O-rings and gaskets also need replacing and should never be re-used.
Clear the Work Area
Clear the work area to ensure there is enough space to work comfortably. Remove any unnecessary equipment or debris that may interfere with the supercharger service process.
Review Troubleshooting Guide
Prior to starting the service, review the R53 Supercharger Troubleshooting guide to identify any potential issues that may need to be addressed during the service process. This can save time and help you prepare for any challenges that may arise.
Wear Appropriate Protective Gear
Protective gear such as gloves, safety glasses, and respiratory masks should be worn throughout the supercharger service. This will help prevent injury and protect against harmful chemicals or debris that may be encountered during the service process.
Disconnect the Battery
Before starting the service, disconnect the battery to prevent electrical shock or damage to the electrical system. Refer to the R53 Supercharger Service Guide for detailed instructions on how to disconnect the battery.
Prepare the Supercharger for Service
Finally, prepare the supercharger for service by removing any necessary components and inspecting them for damage or wear. Document any issues that are found and remove any debris or contaminants that may have accumulated on the supercharger components.
By following these preparation steps outlined in the Supercharger Service Guide, you’ll ensure a smooth and successful R53 Supercharger service process.
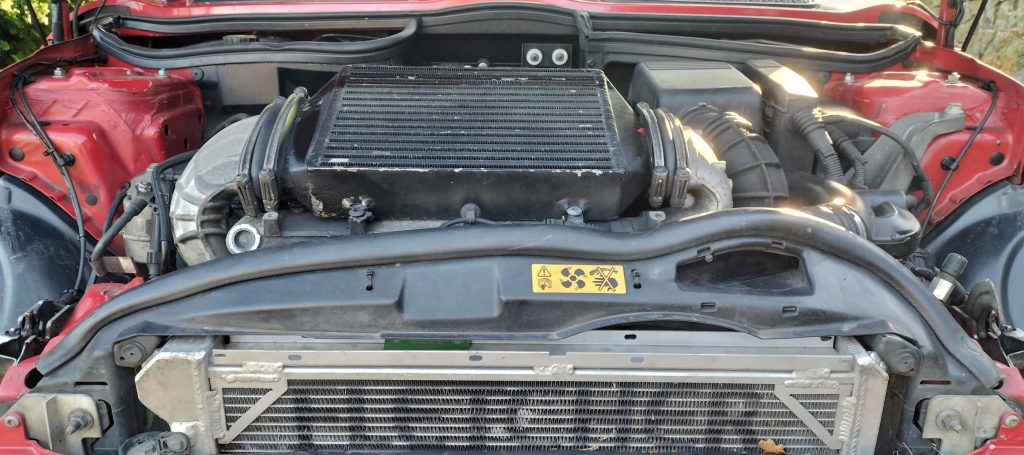
Supercharger Inspection and Cleaning
Regular inspection and cleaning are crucial to maintain the performance and longevity of your R53 Supercharger. In this section, we’ll walk you through the process of inspecting and cleaning your supercharger to ensure optimal functioning.
Supercharger Inspection
Before starting the cleaning process, it’s essential to inspect the supercharger for any signs of wear, damage, or leaks. This step involves removing the supercharger from the vehicle to obtain a thorough inspection. Here are the steps to follow:
- Disconnect the supercharger belt and remove the intake duct and throttle body.
- Unbolt the supercharger from the engine block and remove it from the vehicle.
- Inspect the supercharger housing and rotors for any signs of wear, damage, or leaks. Check the bearings for play and excessive noise. Replace any damaged or worn parts.
- Inspect the bypass valve and actuator for proper functioning and cleanliness. Clean or replace as necessary.
- Inspect the intercooler for blockages or damage. Clean or replace as necessary.
Supercharger Cleaning
Cleaning the supercharger is a crucial step to remove any contaminants that may reduce its efficiency and performance. Here’s how to clean your supercharger:
- Disassemble the supercharger by removing the pulley, snout, and bypass valve assembly.
- Using an appropriate cleaning solution, clean the supercharger housing, rotors, pulley, and snout thoroughly. Be sure to remove any debris or contaminants from the parts.
- Using a soft-bristled brush, clean the bypass valve, actuator, and intercooler. Be gentle and avoid damaging any components.
- After cleaning, rinse all parts with clean water and dry them thoroughly.
- Reassemble the supercharger, ensuring proper torque specifications and alignment.
Regular inspection and cleaning of your R53 Supercharger will prolong its lifespan and ensure it operates at its best. If you notice any issues during the inspection or cleaning process, refer to the Supercharger Repair Guide or R53 Supercharger Service Instructions for further assistance.
Supercharger Belt Replacement
If you have noticed reduced power or a high-pitched noise coming from your R53 Supercharger, it may be time to replace the supercharger belt. This is a routine maintenance task that should be performed every 40,000 miles or when signs of wear or damage are present. Follow these steps for a successful supercharger belt replacement:
- Disconnect the battery to prevent any electrical shocks or accidents.
- Remove the front grille and serpentine belt to access the supercharger belt.
- Loosen the tensioner and remove the old belt.
- Inspect the belt tensioner for any wear or damage and replace if necessary.
- Install the new supercharger belt, ensuring proper tension and alignment.
- Tighten the tensioner and reattach the serpentine belt and front grille.
- Reconnect the battery and start the engine to ensure proper operation.
Replacing the supercharger belt is an easy task that can be done in under an hour with basic mechanical knowledge and a few tools. If you’re unsure about your ability or have concerns about the supercharger, consult a professional for assistance.
Tip: Use a belt tension gauge to ensure proper tension of the supercharger belt. The gauge is placed on the longest stretch of the belt and should read between 0.5 and 0.7 inches of deflection.
With these simple steps, you can ensure the optimal performance of your R53 Supercharger. Regular belt replacement is crucial to prevent damage to other supercharger components and a loss of power. If you need further guidance on R53 Supercharger service, refer to our Supercharger Service Guide or Supercharger Rebuild Guide.
Lubrication and Fluid Replacement for R53 Supercharger Maintenance
Proper lubrication and fluid levels are vital to maintaining the longevity and efficiency of your R53 supercharger. Lubrication helps reduce wear and tear on the supercharger parts and ensures smooth movement of the components. In this section, we will provide you with detailed instructions on how to lubricate the different components of your supercharger and when to replace the supercharger oil.
Lubricating the R53 Supercharger Components
Before lubricating the supercharger components, make sure the engine is fully cooled down. Also, ensure that you have the required lubrication oil and applicator tool. Here are the steps to follow:
- Locate the supercharger oil fill plug and remove it
- Using the lubrication oil, fill the applicator tool
- Insert the applicator tool into the oil fill hole and slowly fill the supercharger oil using the applicator tool
- Once the supercharger oil is full, remove the applicator tool and replace the fill plug
- Start the engine and let it idle for a few minutes to ensure the oil is distributed throughout the supercharger components
It’s recommended to lubricate the R53 supercharger components every 30,000 miles, although it’s best to follow the manufacturer’s recommended service interval.
Replacing the R53 Supercharger Oil
Over time, the supercharger oil may become contaminated or lose its ability to lubricate the components properly. It’s recommended to replace the supercharger oil every 50,000 miles or whenever you notice a decrease in performance. Here are the steps to follow:
- Locate the supercharger oil drain plug and remove it
- Drain the old oil into a suitable container
- Replace the drain plug
- Use the steps outlined above to fill the supercharger with new oil
Note that different R53 supercharger models may have specific lubrication requirements. It’s essential to consult your owner’s manual for the correct lubrication specifications and service intervals.
Other R53 Supercharger Maintenance Tips
In addition to lubrication and oil replacement, there are other maintenance steps you can take to ensure optimal performance of your R53 supercharger. These include:
- Regularly inspecting the supercharger components for signs of wear or damage
- Checking the supercharger belt tension and alignment and replacing it when necessary
- Following the manufacturer’s recommended service intervals for overall engine maintenance
- Monitoring the supercharger boost levels to ensure consistent performance
By following these maintenance tips, you’ll ensure that your R53 supercharger lasts longer and maintains its efficiency over time.
Supercharger Rebuild Process
If your R53 Supercharger requires more than regular maintenance and cleaning, it may be necessary to rebuild the unit. A rebuild involves disassembling and inspecting the supercharger components to determine the extent of the damage or worn out parts, and replacing them accordingly.
Before beginning the rebuild process, ensure you have all the necessary tools, replacement parts, and a clean workspace. Work in a well-lit and well-ventilated area, wearing protective gear such as goggles and gloves to protect against debris and chemicals.
Component Removal
The first step in rebuilding your R53 Supercharger is to remove it from the engine. Follow the manufacturer’s instructions for the specific model of your Mini Cooper S. Once removed, place the supercharger on a clean and level workspace.
Next, disassemble the supercharger by removing the front and rear covers, pulleys, and gears using the appropriate tools. Pay attention to the placement and orientation of each component as you remove them, taking photos or labeling them if necessary.
Inspection and Replacement
Inspect each component for any signs of wear or damage. Check for cracks, corrosion, or excessive wear on the gears, bearings, and seals. Replace any damaged parts with new ones using manufacturer recommended replacements, ensuring they match the specifications of your R53 Supercharger.
Replace any gaskets and O-rings as necessary.
Reassembly
Once all the components have been cleaned, inspected, and replaced, it’s time to reassemble the supercharger. Follow the manufacturer’s instructions carefully, using torque specifications and tightening sequences as directed. Lubricate each component as recommended by the manufacturer, ensuring proper alignment and tension on the pulleys and gears.
Clean and reinstall the front and rear covers, pulleys, and gears, making sure to tighten them to the manufacturer’s specifications.
Testing
With the R53 Supercharger fully rebuilt, re-install it on the engine and test it for proper operation. Check for any abnormal noise, vibration, or leakage. Monitor the performance of the supercharger to ensure that it is functioning properly, and make any necessary adjustments.
If you encounter any problems during the rebuild process, such as stripped screws or damaged components, troubleshoot and resolve them before proceeding. Seek the help of a professional mechanic or a specialized workshop if you are unsure about any aspect of the rebuild process.
By following the step-by-step process outlined in this supercharger rebuild guide, you can restore the performance of your R53 Supercharger and ensure its longevity.
Supercharger Performance Testing and Tuning
Now that you have completed the service or rebuild process of your R53 Supercharger, it’s essential to test and tune the supercharger for optimal performance. Follow the steps outlined below to ensure the best results:
- Warm-up the engine: Start the engine and let it run for at least 15 minutes to allow the supercharger to warm up and reach operating temperature.
- Check for leaks: Check for any leaks or unusual noises that may indicate a problem. You can perform a visual inspection or use a stethoscope to listen for any abnormal sounds coming from the supercharger.
- Measure boost pressure: Use a boost gauge to measure the boost pressure generated by the supercharger. Compare the reading to the manufacturer’s specifications to ensure that the supercharger is operating within its intended range.
- Perform tuning adjustments: If necessary, adjust the supercharger’s tuning settings to achieve optimal performance. This may include adjusting the fuel-to-air ratio or the ignition timing. Consult your owner’s manual or a professional technician for guidance.
- Test drive: Take your Mini Cooper R53 Supercharger for a test drive to evaluate its overall performance. Pay attention to how the car accelerates, handles, and responds to changes in throttle input.
- Re-check: After your test drive, re-check for any leaks or unusual noises that may have developed during the test drive.
By following these steps, you can be sure that your R53 Supercharger is running at its best. However, it’s important to note that tuning adjustments should only be made by experienced technicians with the proper tools and equipment. Improper tuning can cause serious damage to the supercharger and the engine. We hope this How To Service an R53 Mini Cooper S Supercharger guide is of benefit.
Supercharger Maintenance Tips and Best Practices
Regular maintenance is key to keeping your R53 Supercharger in top shape. Here are some additional tips and best practices to ensure the longevity and performance of your supercharger:
Inspect Regularly
Perform regular inspections of your supercharger to catch any potential issues early on. Look for signs of wear, damage, or leaks and address them promptly to avoid further damage.
Follow Service Intervals
Refer to your owner’s manual or consult with a professional mechanic to determine the recommended service intervals for your supercharger. Following these guidelines will help keep your supercharger operating at its best and may prevent costly repairs down the line.
Use Quality Parts and Lubricants
When replacing parts or lubricating your supercharger, be sure to use high-quality products that are recommended by the manufacturer. Using inferior products may cause damage to your supercharger and reduce its lifespan.
Monitor Fluid Levels
Regularly check the fluid levels in your supercharger and add or replace fluids as necessary. Low fluid levels can cause damage to the supercharger and reduce its efficiency.
Listen for Unusual Noises
If you hear any unusual noises, such as whining or grinding, coming from your supercharger, it may indicate a problem. Address these issues promptly to avoid further damage and ensure optimal performance of your supercharger.
Have Regular Professional Checkups
Consider having your supercharger professionally inspected and serviced on a regular basis. A professional mechanic can catch any potential issues early on and ensure that your supercharger is operating at its best.
By following these tips and best practices, you can help ensure that your R53 Supercharger remains in top shape and operates at its best for years to come.
How To Service an R53 Mini Cooper S Supercharger – FAQ
How often should I service the supercharger of my R53 Mini Cooper S?
It is recommended to service the supercharger of your R53 Mini Cooper S every 50,000 miles or as per the manufacturer’s guidelines.
What are the common signs of a supercharger in need of service?
Common signs include abnormal noise, decreased performance, oil leaks, and increased oil consumption.
Can I service the supercharger myself, or do I need to take it to a professional?
While some maintenance tasks can be done by experienced DIYers, it is recommended to consult a professional for complex repairs or rebuilds to ensure proper handling.
What tools and materials do I need for supercharger service?
The tools and materials needed may vary depending on the specific service task. However, common tools include socket wrenches, screwdrivers, torque wrenches, and supercharger oil.
How long does it take to rebuild a supercharger?
The time required for a supercharger rebuild can vary based on the complexity of the task and the individual’s experience. It can take several hours to complete the process.
Can I use any type of supercharger oil for lubrication?
No, it is important to use the specific type of supercharger oil recommended by the manufacturer to ensure proper lubrication and prevent damage to the supercharger components.
How can I test the performance of my R53 Supercharger after service?
Performance testing can be done through various methods, including measuring boost pressure, monitoring engine performance, and conducting diagnostic scans using specialized equipment.
Are there any precautions I should take during supercharger service?
Yes, it is important to disconnect the battery, follow safety protocols, and refer to the service manual for specific precautions before starting any supercharger service task.
What are some best practices for maintaining the supercharger?
Regular inspections, proper lubrication, and following recommended service intervals are key to maintaining the performance and longevity of the supercharger. It is also important to address any issues promptly to prevent further damage.